Showing posts with label nail art. Show all posts

Wednesday, April 18, 2012

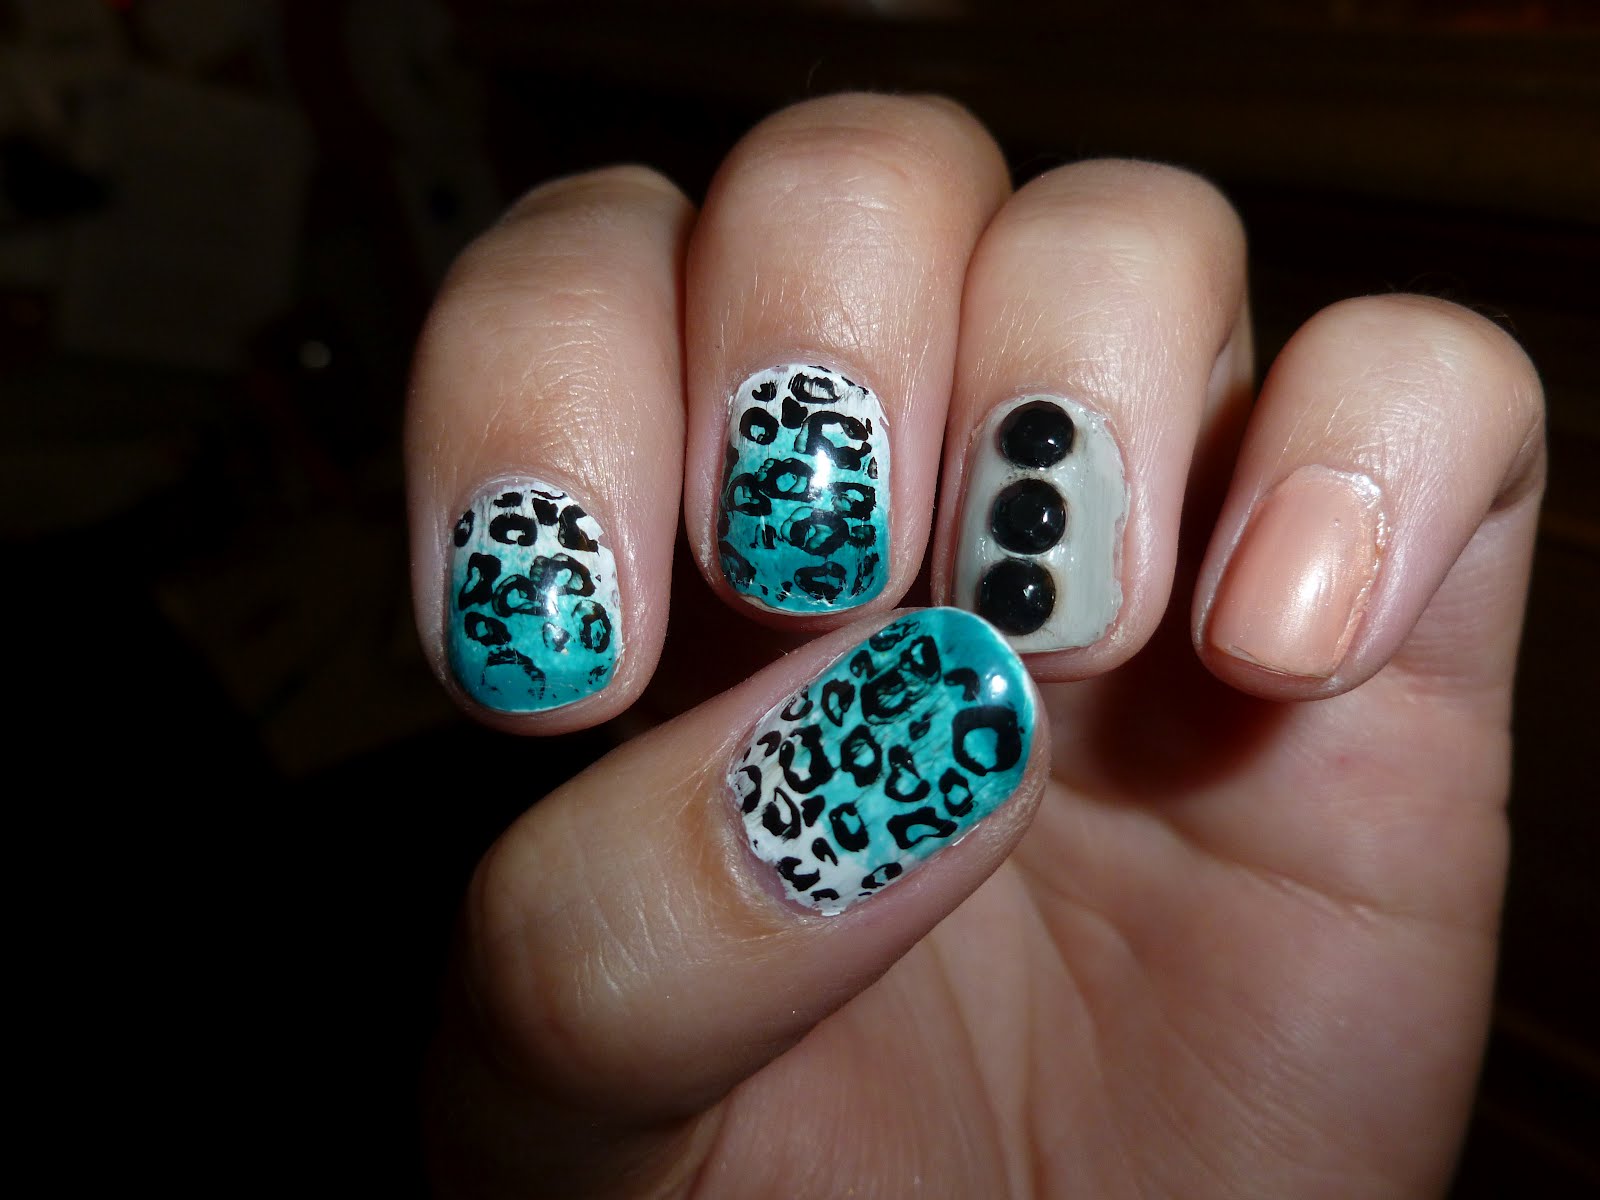
Ombre Leopard


I have to say I LOVED this design. I knew I wanted to do ombre but, I wasn't so sure that it would look good on me. I know, a tad ridiculous considering my nails are always a little cray. To do the ombre, first paint your nail all white (I did gray on a friend and it looked WAY better, picture below) I didn't like the white that I used and I generally don't like white polish because it gets gunky. Once dry, sponge on the colour (I used OPI's "Fly") 3/4 of the way down your nail. Then once dry do it to 1/2 then 1/4. So majority of the colour would be at the top of your nail (darkest) and fade into the lighter part (the white).

Once that was all set, I used the Konad stamping kit for the leopard print. The plate that I used was BM 221. I don't really like the Konad polishes that came with the kit because they tend to rub off, as you can see in the picture, the spots came off in some parts. Which is frustrating because there is top coat on there! The konad polish also doesn't react well to top coat because it drags the design (ugh!)

This is the variation I did on my friend Elizabeth! Products Used (Mine):
Mummy Knows Best- OPI
Fly-OPI
BM Plate 221
Skull & Glossbones - OPI
Smooth & Perfect in Sorbet - Sally Hansen

Products Used (Elizabeth):
Skull & Glossbones - OPI
the "It" Color - OPI
BM plate 225
Hot & Spicy - OPI


PLH,
kmatheson

Thursday, April 5, 2012

Easter Nails


Colours used: thumb and 1st two fingers OPI's "Planks a lot", Ring finger OPI's "Pink Friday", Pinky finger Orly's "Spark". The Snail's shell is OPI's "What's with the Cattitude"

I also used OPI's "I Juggle...Men" on the first two fingers as a glitter over coat but it didn't end up showing too well. I have to say I'm a little disappointed in that bottle its too subtle for my liking. But I will give it another try soon!

Just a little spring Easter design! The snail is by request! From my boyfriend who wanted to see a snail nail, not sure how well I did!

Enjoy,
kmatheson

Sorry for all the short posts lately, school has been mega busy! There will be once I'm not so busy

Thursday, March 29, 2012

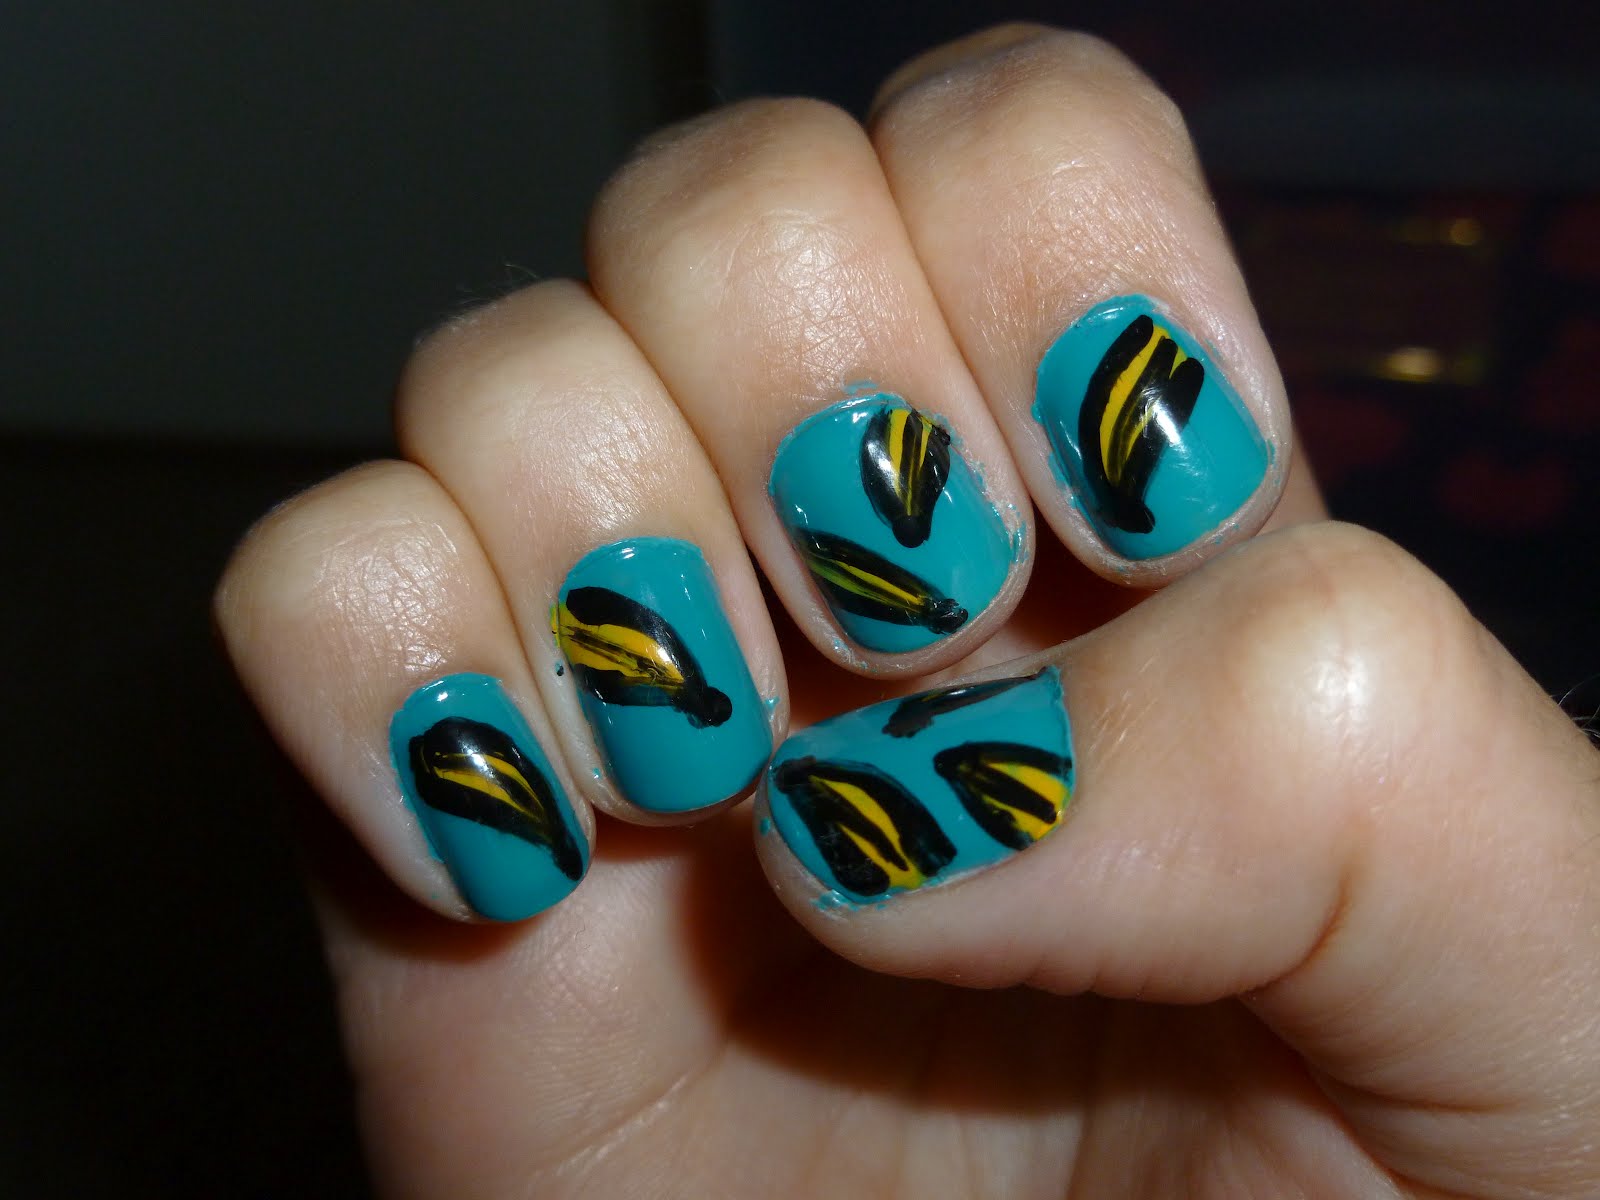
These nails are bananas, B-A-N-A-N-A-S


Trust me, that song will now be stuck in your head...

Start off with a base colour I used OPI's "Fly" (Nicki Minaj Collection) I use this colour a lot, it's definitely worth purchasing if you can find it!
With a striping brush, put a yellow long streak and let dry. I used OPI's "the IT colour"
Once it dries, get another striping brush and outline the bananas with black.
Seal with a top coat and you're done!

You don't have to do different bananas all over, I just wanted to do that!

Enjoy!
kmatheson

Saturday, March 24, 2012

Time for a little Summer


Seeing as it's been so nice outside lately, I felt the need to make my nails a little bit more summer-y. Now this watermelon manicure has been all over blog sites (not really recently, but I've seen them around) and it's simple.

Start by painting your nails a coral or pink I used OPI's "Big Hair, Big Nails" from the Texas collection. Then I painted the 'rind' which the green I used doesn't have a name on it but anything that is a rich green will work. Then I used a striping brush for the white of the rind, easy peasy. For the "seeds" I used the end of a black striping brush creating long dots. and Volia!

I know mine is a bit messy, I was getting quite shaky!

Enjoy!
kmatheson

Sunday, March 4, 2012

Hey Stud


FINALLY!
I got studs for my nails! I had been looking for those for a very long time, it was a great find for my nail obsession. Besides the studs, I also used Sally Hansen's Smooth and Perfect nail polish in 08 Sorbet which I was curious about because I wanted to know about the smooth claim and what not (that's the peachy colour used in the design). At first I didn't like the nail polish because I don't like colours that look too nude and I wanted this one to be more pink. However once I was finished the design, how my nails felt was incredible. They feel like fake nails because they are so smooth (even with the stud on it) I'm thoroughly impressed with this polish because my nails chip and crack so easily this one really protects it. They have a lot of really nice pastel colours too which I'm currently dying over. At about 7 dollars they are worth picking up!
Colours used: "Fly" By OPI (Nicki Minaj Collection), "08 Sorbet" By Sally Hansen Smooth and Perfect.

Also! I finally included an HD picture :) (it's the first one)

PLH,
kmatheson

Tuesday, February 7, 2012

Finally!

For the longest time I've been trying to figure out how to get rhinestones on my nails. Honestly, I tried researching it and looking at other nail blogs but to no avail. Finally I heard that the rhinestones being used are for jewelry design! Once you have the rhinestones all you do is put a layer of base coat on your nail (I used Witchcraft Nail Hardener), put the rhinestone on and then put top coat over (I used Essie's Good to Go). I honestly put the top coat on in giant blobs, it's better to be very generous with it. The first round that I did, I didn't lose a single one! The second time I did lose one but I was less liberal with the top coat that time. Definitely after this discovery I feel like my nails look a lot better :) Mystery Solved!

Nail Colours used: Essie's Chinchilly, OPI's Planks a lot.

I bought the rhinestones from Michaels for about seven dollars. Just make sure that the sizes you are buying can be used on your nail and aren't too big.

PLH,
kmatheson

Monday, May 9, 2011

Review: Sally Hansen's Nail Art


Right before Easter I tried Sally Hansen's real nail polish strips because I was in the middle of moving and it was getting really annoying whenever my nails would chip so I figured that this was a good solution. How this works is you buy a pack and it comes with a buffer, a file, a cuticle stick and 16 nail stickers, however mine only came with 12. You prep each nail by buffing it and filing it down, the package also suggests making sure that your nails are super clean, so no leftover polish! Then you size the sticker to your nail (there's tons of sizes so one is bound to fit) and then peel off the back and put it on your nail. With the excess sticker you file it down to your nail. It's difficult to explain, but it's super simple to do! You can size down the sides too with the cuticle stick so there's none poking out the sides.

I chose the pattern "Girl Flower" but there are a ton of different patterns and Sally Hansen is introducing more later in the spring and summer season. One pack retails for about 10 dollars (CDN) so approximately one bottle of regular polish. It guarantees that the pattern will last 10 days, mine lasted about 14 because I put on a top coat every night after about the fifth day. I would definitely recommend this product just because it's fun change and its so easy. The only compliant that I have is if you're doing it on short nails, the process of putting them on will make them shorter, be weary of that!

If you want to check out the different patterns click here.

PLH,
kmatheson

Tuesday, February 8, 2011

Review: OPI's Black Shatter


oh. my. goodness. :)

I tried SO hard to get this polish and by some genius stroke of luck I FINALLY got it!


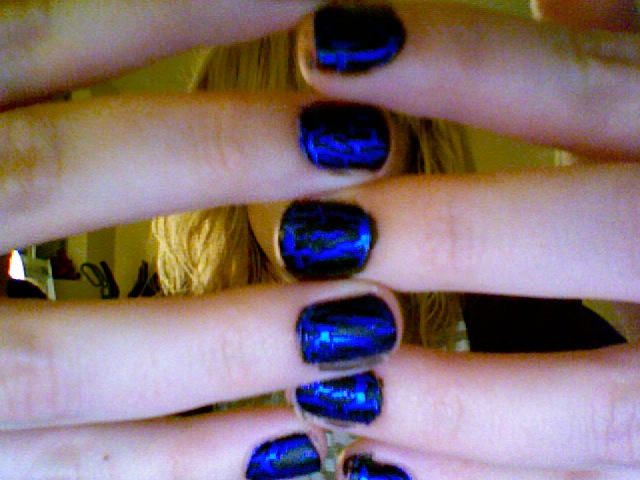
This polish makes nail art super easy and it looks really nice :) I think that it would look better with a lighter colour underneath but I was so excited I just used the polish I had on already. (Nicole by OPI "Loyalty to Royalty") I saw this used with a bright pink underneath and I think that it looked a lot better.

How this polish works is you have a base coat (which is the blue that I used) and then paint a layer of this black shatter over top. Make sure that the base coat is dried COMPLETELY otherwise it will not work. At first the polish will look solid black but then as it dries it shifts apart creating the shatter effect. Let that dry, and you have beautiful nails!

Before purchasing this bottle I watched this video, it will show you the shatter effect better as well. If you just want to see the shatter effect go to 1:30.

Here's a clearer picture:


Prepare to see a lot of this colour as I will be using it a lot!


PLH,
kmatheson