Thursday, March 29, 2012

These nails are bananas, B-A-N-A-N-A-S


Trust me, that song will now be stuck in your head...

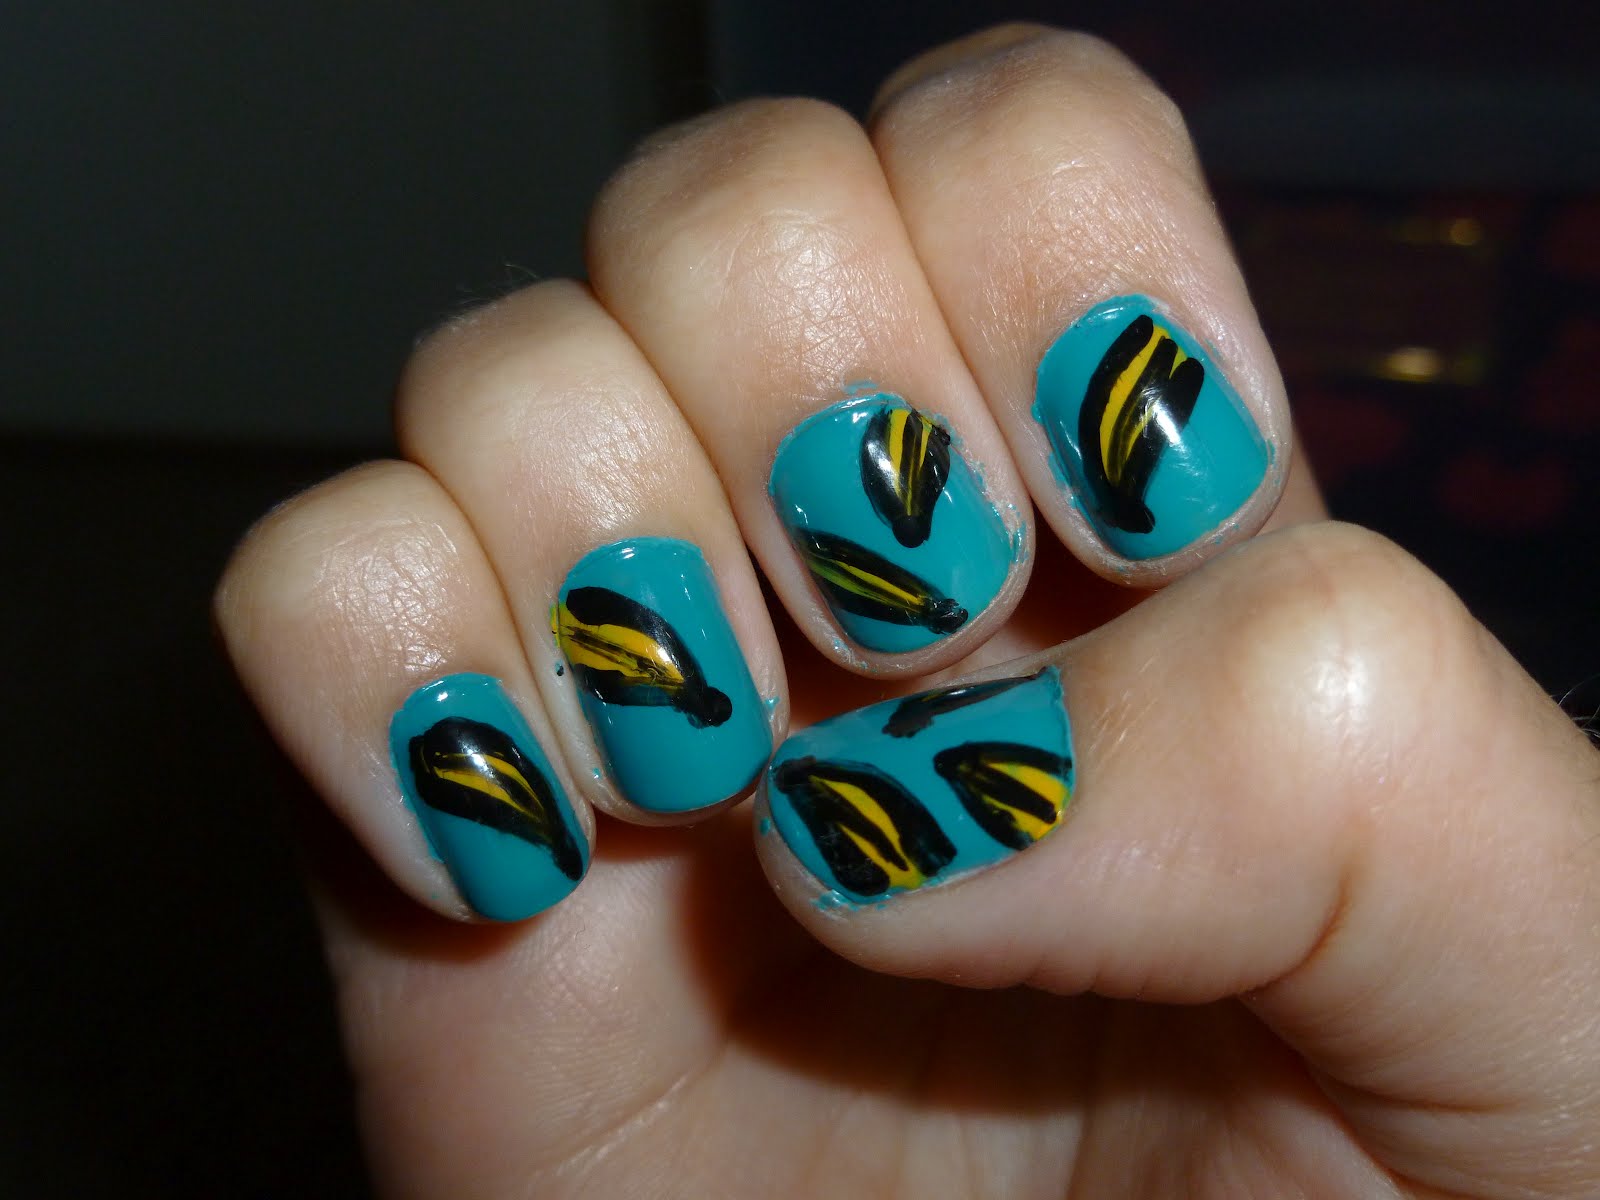
Start off with a base colour I used OPI's "Fly" (Nicki Minaj Collection) I use this colour a lot, it's definitely worth purchasing if you can find it!
With a striping brush, put a yellow long streak and let dry. I used OPI's "the IT colour"
Once it dries, get another striping brush and outline the bananas with black.
Seal with a top coat and you're done!

You don't have to do different bananas all over, I just wanted to do that!

Enjoy!
kmatheson

Saturday, March 24, 2012

Time for a little Summer


Seeing as it's been so nice outside lately, I felt the need to make my nails a little bit more summer-y. Now this watermelon manicure has been all over blog sites (not really recently, but I've seen them around) and it's simple.

Start by painting your nails a coral or pink I used OPI's "Big Hair, Big Nails" from the Texas collection. Then I painted the 'rind' which the green I used doesn't have a name on it but anything that is a rich green will work. Then I used a striping brush for the white of the rind, easy peasy. For the "seeds" I used the end of a black striping brush creating long dots. and Volia!

I know mine is a bit messy, I was getting quite shaky!

Enjoy!
kmatheson

Monday, March 12, 2012

DIY: Giraffe Capped Shoes

You Will Need:
-Scissors
-Fabric Glue (preferably one that has a permanent bond)
-Shoes
-Fabric of your choosing (I chose giraffe print)
-A Marker
Start by measuring your fabric to your shoes, I wanted clean edges so I doubled up the fabric and put the fold on the top of the shoe. You can use the marker to see where to cut once it hits the bottom of the shoe.

Again you want to make sure that you have clean edges, so fold the fabric under around the edges of the shoe and glue down. That purpley-white stuff is the fabric glue.The toes was the hardest part so I suggest completing both sides FIRST, then folding the middle in so that you get nice clean edges...

...like so!
Voila! An easy way to make your old shoes new! I was pretty generous with the amount of glue that I used that's why mine got a little messy but I used scrap fabric to clean up the edges. Depending on the glue that you use, you'll probably have to wait about 24 hours before you wear these puppies out!

Enjoy!
kmatheson

Sunday, March 4, 2012

Hey Stud


FINALLY!
I got studs for my nails! I had been looking for those for a very long time, it was a great find for my nail obsession. Besides the studs, I also used Sally Hansen's Smooth and Perfect nail polish in 08 Sorbet which I was curious about because I wanted to know about the smooth claim and what not (that's the peachy colour used in the design). At first I didn't like the nail polish because I don't like colours that look too nude and I wanted this one to be more pink. However once I was finished the design, how my nails felt was incredible. They feel like fake nails because they are so smooth (even with the stud on it) I'm thoroughly impressed with this polish because my nails chip and crack so easily this one really protects it. They have a lot of really nice pastel colours too which I'm currently dying over. At about 7 dollars they are worth picking up!
Colours used: "Fly" By OPI (Nicki Minaj Collection), "08 Sorbet" By Sally Hansen Smooth and Perfect.

Also! I finally included an HD picture :) (it's the first one)

PLH,
kmatheson